はじめに
SharepointFrameworkの検証を行います。
この記事では、以下について扱います。
- SharePointFrameworkのインストール
- とりあえずSharePointFrameworkで実行してみる
- jqueryの追加
- 独自処理 - WordPress連携部分の追加
※SharepointFrameworkの概念の話はしません。それはまた別の機会に。
実装
今回の参考資料
SharePointFrameworkのインストール
- nodeを未インストールの場合、nodeをインストール
-
npm確認
npm --version -
必要パッケージインストール
npm install -g yo gulp npm install -g @microsoft/generator-sharepoint -
SharepointFrameworkインストール先のフォルダを作成
mkdir SharePointWordpress
cd SharePointWordpress- SharepointFrameworkインストール実行
yo @microsoft/sharepoint
ここで、対話式でさまざまなことを聞かれるので、回答します。
  What is your solution name? : (任意のソリューション名)
  Which baseline packages do you want to target for your component(s)? :(そのままEnter。SharePoint Onlineのみ)
  Where do you want to place the files? : (そのままEnter。カレントフォルダにインストール)
  Do you want to allow the tenant admin the choice of being able to deploy the solution to all sites immediately without running any feature deployment or adding apps in sites? : (N)
  Will the components in the solution require permissions to access web APIs that are unique and not shared with other components in the tenant? : (N)
  Which type of client-side component to create? : (そのままEnter。WebPart)
  What is your Web part name? : (任意のWebパーツ名。この名前が画面に表示される様子)
  What is your Web part description? : (説明文。面倒なのでそのままEnter)
  Which framework would you like to use? : (JSのフレームワーク。Reactとか使う場合は指定する様子)
これが完了したら、インストールが開始されます。超時間かかりますが、待ちましょう。
-
Visual Studio Codeで、インストールしたフォルダを開いて起動
-
Ctrl + Shift + Bで、gulpのビルド実行
gulp buildを選択 → タスクのスキャンを出力せず実行 をクリック
→これで、元々入っているSharePointFrameworkのビルドが実行されます。 -
VSCodeで、以下のコマンドを実行
gulp serve→ブラウザが立ち上がり、SharePoint WorkBenchが起動します。
-
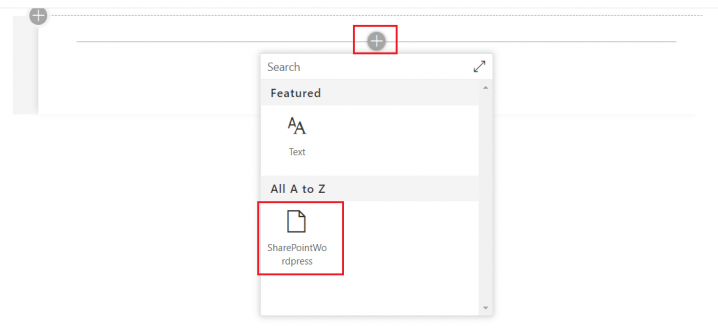
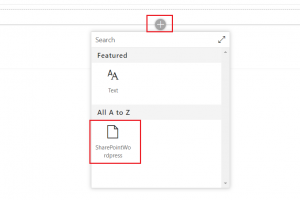
「+」ボタンをクリック後、パーツ名をクリックし、Webパーツを配置します。
-
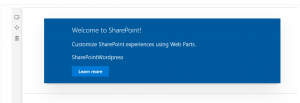
既定のパーツが配置されていることを確認します。
カスタマイズ
デフォルト設定で起動できることを確認したら、ここからカスタマイズをしていきましょう。
jquery追加
まずはjqueryの追加です。
-
VSCodeで、以下のコマンドを実行
npm install jquery@2 --save npm install @types/jquery@2 --save -
VSCodeで、config/config.jsonを開き、externalsに以下を追加
"jquery":"node_modules/jquery/dist/jquery.min.js"
独自処理を追加
独自処理として、今回はWordPressのAPIを使用し、WordPressの記事一覧を取得し表示します。
※WordPressの向き先は、とりあえず自社サービスのものにしています。
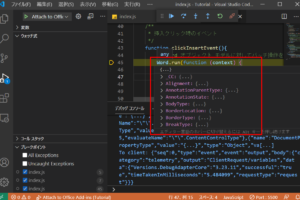
- src\webparts\sharePointWordpressに、WordPress.tsを追加します。
その後、以下のコードを追加します。
import * as $ from 'jquery';

export default class WordPress {
  public static getWordpressHtml = () => {
    var $defer = $.Deferred();

    // wordpressのAPIのURL
    $.getJSON('https://exment.net/wp-json/wp/v2/posts?_embed').then((data) => {
          console.log(data);

          var html = '';
          for(var index in data){
              var d = data[index];

              var title = d.title.rendered;
              var link = d.link;
              var excerpt = d.excerpt.rendered;
              var date = d.date;

              // ul作成
              var $a = $('<a/>', {'href' : link, 'style' : 'margin-bottom:4em; display:block;'});
              var $ul = $('<ul/>');

              $ul.append($('<li/>', {'text': 'タイトル:' + title}));
              $ul.append($('<li/>', {'text': '日付:' + date}));
              $ul.append($('<li/>', {'html': '本文:' + excerpt}));

              $a.append($ul);

              html += $a[0].outerHTML;
          }

          $defer.resolve(html);
      });

    return $defer.promise();
  }

}
- src\webparts\sharePointWordpress\SharePointWordpressWebPart.tsの記述を修正します。
import { Version } from '@microsoft/sp-core-library';
import { BaseClientSideWebPart } from '@microsoft/sp-webpart-base';
import {
  IPropertyPaneConfiguration,
  PropertyPaneTextField
} from '@microsoft/sp-property-pane';
import { escape } from '@microsoft/sp-lodash-subset';

import styles from './SharePointWordpressWebPart.module.scss';
import * as strings from 'SharePointWordpressWebPartStrings';

///// 追加---s
import * as $ from 'jquery';
//WordPress.tsを読み込む
import WordPress from './WordPress';
///// 追加---e

export interface ISharePointWordpressWebPartProps {
  description: string;
}

export default class SharePointWordpressWebPart extends BaseClientSideWebPart<ISharePointWordpressWebPartProps> {

  public render(): void {
    ///// 修正---s
    // WordPress.ts内のgetWordpressHtml実行
    WordPress.getWordpressHtml()
      .then((html:string) => {
        $(this.domElement).html(html);
      });
    ///// 修正---e
  }

  protected get dataVersion(): Version {
    return Version.parse('1.0');
  }

  protected getPropertyPaneConfiguration(): IPropertyPaneConfiguration {
    return {
      pages: [
        {
          header: {
            description: strings.PropertyPaneDescription
          },
          groups: [
            {
              groupName: strings.BasicGroupName,
              groupFields: [
                PropertyPaneTextField('description', {
                  label: strings.DescriptionFieldLabel
                })
              ]
            }
          ]
        }
      ]
    };
  }
}
-
再度Ctrl + Shift + Bで、ビルドを行います。
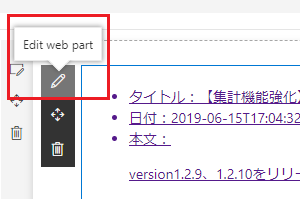
その後Sharepoint WorkBenchにアクセスすることで、WordPressの記事一覧が表示されます。
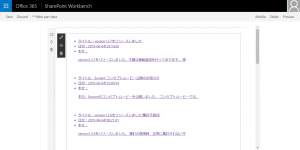
-
無事、jqueryも呼び出した上で、独自の実装を実現できました!


コメントを残す